Monday, February 28, 2011

Clothes: Rotating through the sizes...

Well, it's that time again - and BOY has it snuck up on me - to pack up all of the newborn and 0-3 month clothes and get out my 6-9 month clothes. No, I didn't forget about 3-6 month... I keep two sizes in the closet at a time so I'm not always rotating clothes up to the attic. Although I do keep a small box on the floor of the closet for the clothes that she outgrows before I do an entire closet cleaning.
There are clothes ALL over poor Jillian's room - between unpacking from our latest trip, doing laundry, and now switching out the clothes... there is no where to walk! (wish me luck on tomorrows early morning feeding).

While we are on the subject of laundry... can I say "ugh!!". Actually, I take that back; it's not the 'doing' of the laundry that I dislike, that's childsplay. It's the 'putting it away' aspect that kills me every time. In my house, laundry is like a 3-day event.
Day 1: Separate clothes into piles on the hallway floor:
  • towels/sheets
  • lights
  • darks
  • pinks (I have 2 daughters, this is usually my largest pile)
I then work my way through said piles. Washer --> dryer --> miss the buzzer (because my "laundry room" is in my garage... again UGH) --> fluff clothes and listen through the open garage door for the buzzer --> while warm, take out clothes and lay flat on back of couch (So I don't have to iron more than usual OR wear wrinkled clothes)
I do this until all clothes are laid out and separated by it's owner.
By this time, I'm bored of laundry... so I leave clothes until later.
Day 2: Since the couch is all cluttered with the clothes, I decide to move the clothes into their designated rooms so I can 'get to them when I have a free moment'.
I forget about clothes for the rest of the day. Out of sight, out of mind.
Day 3: Decide its time to put the clothes away because the cats inevitably determine that the clothes are the perfect place to nap. Bring clothes back onto the couch, armed with a hundred or so large and small plastic coat hangers, and finally finish the laundry! Woo hoo.
But wait... with 4 people in this household, it's almost time to do laundry again... oh... joy...

Disclaimer: Please read this post as a humorous tongue-in-cheek assessment of laundry day (er... or 3), and not just as one big ole' complaint.

Photobucket

Friday, February 25, 2011

Italian Mac n Cheese: My go-to 'welcome new baby' meal

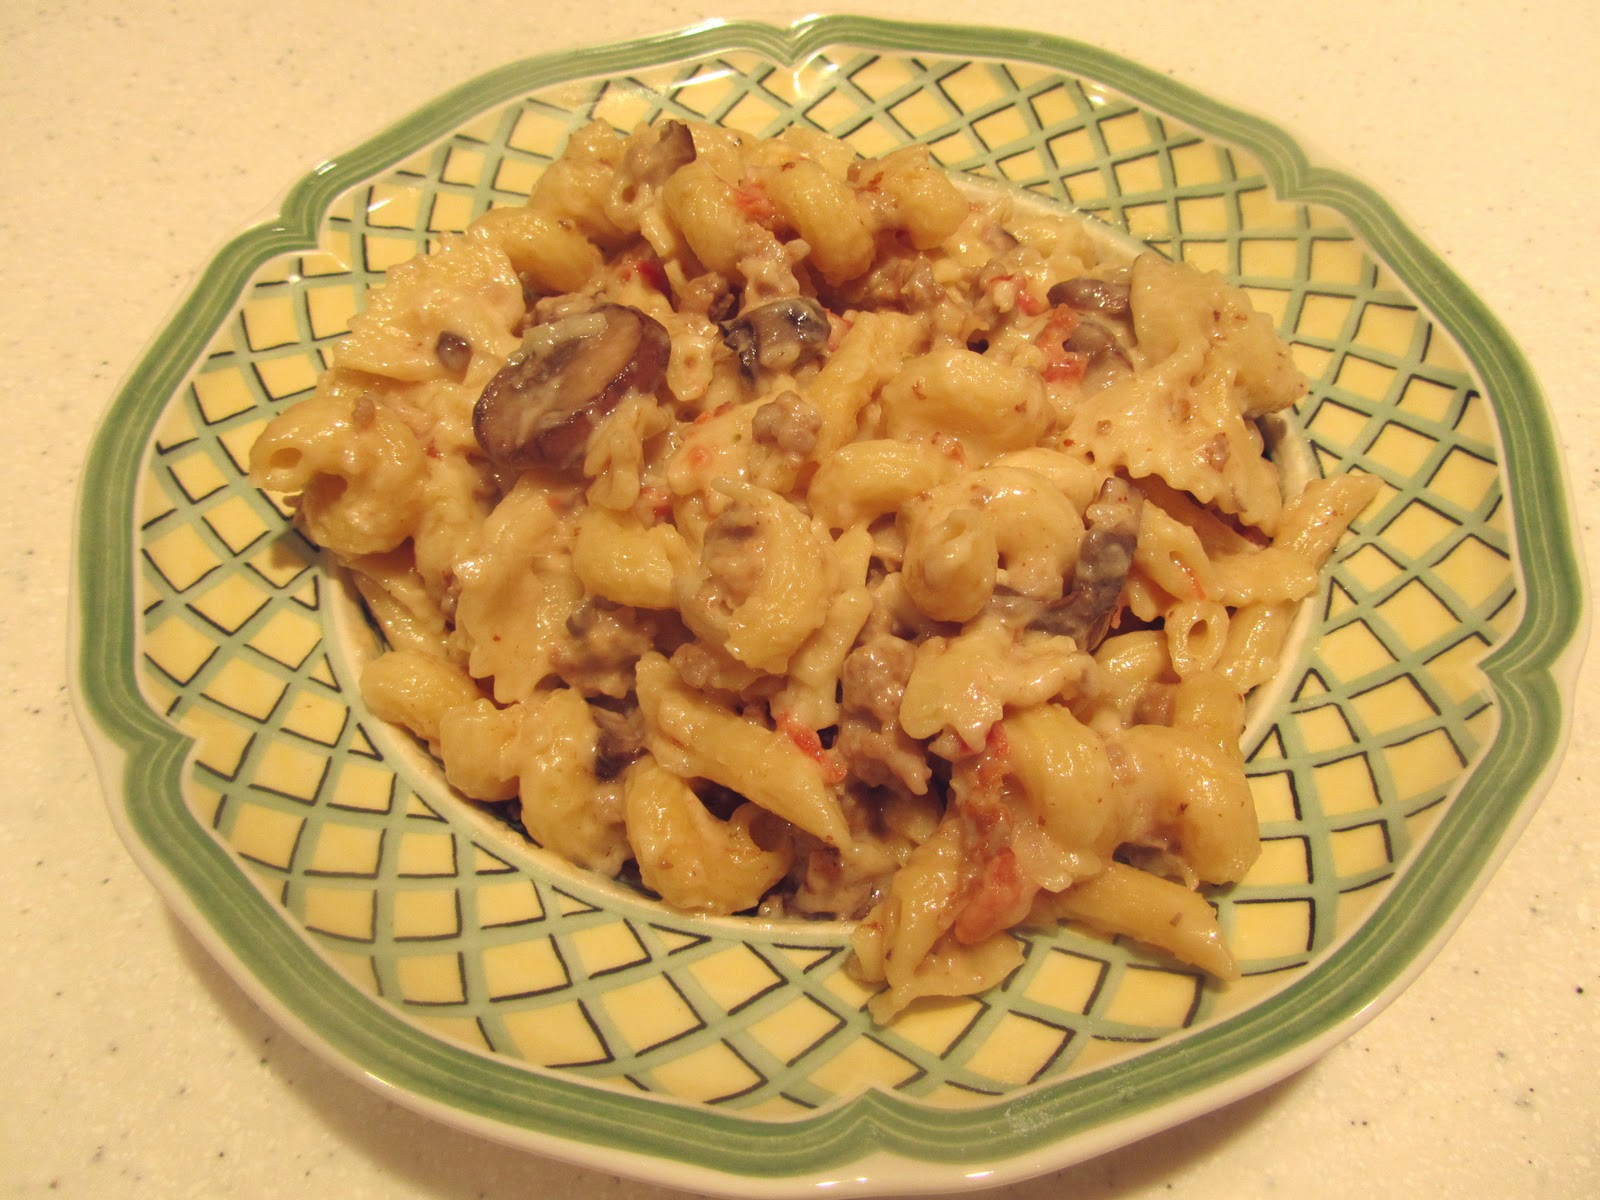
I am part of a local mom group, and whenever one of our members has a new baby, an event is added to our playdate calendar to allow members to sign up to bring dinner for the family. (Nice, huh?) This Italian Mac n Cheese recipe is my go-to meal ever since I brought it to one of our dinner playdates and it got rave reviews. It is easy to double and freeze in disposable baking pans. I hope you enjoy it!

Italian Mac-n-Cheese

Ingredients
1 pound *ziti, penne rigate or cavatappi (ribbed,hollow corkscrews)
1 pound Italian bulk sweet or hot sausage, casing removed
2 tablespoons olive oil
1 tablespoon butter or margarine
3-4 cloves garlic, chopped
¾ cup chopped onion
1 package baby bella (portabella) mushrooms or white mushrooms, sliced
Salt and pepper
3 tablespoons all-purpose flour
1-1/2 cups chicken stock
1-1/2 cups heavy cream (to lessen fat, use 2% evaporated milk or combination of both)
10-ounce sack (2-1/2 cups) shredded Italian 4 cheese blend
1 can diced tomatoes, drained well (I use Roi-Tel)
½ teaspoon Tabasco, optional (I use Chipotle Tabasco)
½ cup fresh Parmesan

Directions
Bring a large pot of water to a boil. Salt water and cook pasta to al dente (do not overcook).

In a skillet, brown and crumble the sausage. Drain on paper towel. Return pan to heat and add olive oil, butter, onions, and mushrooms. Season liberally with salt and pepper. Saute 4-5 minutes. Add garlic and cook an additional minute.

To mushroom mixture, add flour and stir, cooking 2 minutes. Stir in stock then stir in cream. Bring cream mixture to a bubble, then stir in 2 cups of 4-cheese blend. When cheese has melted into sauce, add tomatoes. Remove from heat and add hot sauce is desired.

Pour cheese sauce with sausage and pasta, transfer to baking dish or casserole. Sprinkle with remaining ½ cup cheese and top with Parmesan. If serving immediately, brown under the broiler until cheese melts. (I find this does NOT always heat the casserole adequately. I top casserole with foil sprayed with Pam, and bake at 400 for 15 minutes.

To prepare in advance, prepare sausage/mushroom/cheese mixture (everything except pasta) and refrigerate. Cook pasta and add to sausage mixture. Cover with Pam-sprayed foil and bake 400 degrees for 15 to 20 minutes. Stir. Uncover, top with additional cheese and Parmesan, and bake an additional 5 minutes.
To Freeze:
Spray disposable pan and add Mac-n-cheese. Leave OFF the additional cheese and Parmesan. Cover with a foil lid. Wrap more foil around pan to completely seal. To cook, thaw completely and then cook according to the last paragraph.
*You may notice from the picture I used a few different types of pasta. This is not something that I used to do, until my mom pointed out one simple fact. See, I wouldn't use different pastas because of the different cooking time... which now that I type it out, sounds really really stupid. The funny thing is that I consider myself to be a pretty good cook... and I never thought to do this? I used Bow Ties (10 min), Corkscrews (8 min), Mezze Penne (9 min). So anyway, my mom pointed out the obvious... put in the bow ties first and set the timer to 10 minutes. When the timer gets to 9, put in the Mezze Penne, and when it gets to 8 put in the Corkscrews. Duh! Yeah, I felt stupid.

Wednesday, February 23, 2011

My sweet little legacy...

Ok, for all my Alpha Chi's out there... this is for you! I couldn't resist.


Crafty Baby Shower Gifts

This past weekend was my sister-in-laws baby shower up in Alabama. She is the one that I made my latest diaper cake for (which I am SUPER proud of). I love how I used the stuff from her registry to decorate the cake: links around the top 2 layers, baby shampoo and lotion, wrist rattles around the shampoo and lotion bottles, spoons, teething rings, etc. Also, this was the first time that I used crinkle paper between the layers and I really liked how that looked.


The girls and I (hubby is playing army for 2 weeks) made a vacation out of it. We drove 7.5 hours up to my parents house for a few days, then made a day trip up to AL for the shower. We had a relaxing time at my parents' lake and it gave Pop pop and Gigi time with the girls. Plus, Charlotte got to see the horses (twice) and feed the fish.
But back to the crafty projects... the diaper cake wasn't the only crafty gift that I made it to the shower with. As timing would have it, one of the blogs I follow posted instructions on how to make those adorable onesie & burp cloth cupcakes the day or so before I left. When I got to the lake, I showed my mom the instructions and we decided do give it a shot.

 We didn't have one of those nifty bakery boxes so we wrapped a box lid with pink paper and filled the bottom with the crinkly paper. I used the gerber 3-pack of onesies as well as burp clothes and topped them off with cute little bows from walmart. This may be my new favorite baby shower gift!! If I get the gender and initials ahead of time (ahem ahem Shannon... :) ) then I would totally embroider monograms or cute little designs on them. Perhaps this will be a good 'Congrats on the birth of your son/daughter' type of gift.

Linking up: Gluesticks, Tatertops and jello, Making the world cuter, C.R.A.F.T., Lamb Arounc, Marvelously Messy, Keeping it Simple, The Tattered Tag, Dot Dot Dot, Somewhat Simple, Vintage Wanna Bee, Finger Prints on the fridge, Nap Time Crafters, Sun Scholars

Tuesday, February 22, 2011

5 months old today!!

I can't believe it's been 5 months since Jillie was born!!

And NOW she's on rice cereal... my baby is growing up.
She hasn't quite taken to it yet... but I'm sure once we start the good stuff she'll come around!!

4 months


3 months


2 months

1 month

Tuesday, February 15, 2011

Birthday Sneak peak::. Mickey Cookies

With Charlotte's 2nd birthday fast approaching, I am scouring the Internet and racking my brain for some cute and clever ideas and recipes to use for her Minnie/Mickey Mouse themed birthday party at the park.

Last week, after googling "mickey birthday" and "mickey recipes", I came across a blog post here where a mom was baking chocolate chocolate chip cookies and accidentally made mickey ears.

I figured this would be a PERFECT addition to my snack and dessert table at the birthday party. I decided to use my Chocolate Button Cookie Recipe to make these. They are a fudgy cookie that I make for all holidays, I just switch the color non-pareils I use when I flatten the cookie. For my mickey cookies I left off the non-pareils.

ANDY'S CHOCOLATE BUTTONS

* again with the whole naming recipes after a family member thing... Andy is my oldest brother
12 oz. pkg semisweet chocolate chips
4 T. butter or margarine
14 oz. can Eagle Brand
1 c. all-purpose flour
1 c. chopped pecans
1 t. vanilla


GREASE COOKIE SHEETS. Melt chocolate and butter in microwave. Add Eagle Brand, flour, pecans and vanilla. Stir well. Drop by rounded teaspoon balls. Flatten slightly with glass. (For Christmas, I dip the glass in white or red sprinkles then flatten. Halloween is orange, football season is orange and purple, etc)


Bake at 325 deg. for 8 to 10 min. They should be chewy like fudge.

Since these cookies do not spread when baked, I had to manually put together the Mickey head. I used 1 scoop for the head and split one scoop for each ear. I then rolled and flattened the head, then rolled both ears and overlapped the head slightly, then flattened all together. I found that overlapping made the ears less likely to fall off. In fact, last night only one cookie fell apart (I used that cookie for quality assurance purposes... it passed)

Unbaked cookies

Flatten cookie with bottom of glass

Finished product (minus maybe a Minnnie bow of some sort)

Linking up: Gluesticks

Monday, February 14, 2011

Happy Valentines Day

... or as my best friend Erika put it today on facebook, "Happy Hallmark Holiday"... so true isn't it. Do you guys have fun plans with your Valentines this year? I don't... thanks to the Florida National Guard I am once again a temporary single mother of 2, but no biggie... Valentines Day has NEVER been our holiday.

In fact, we've never really been alone (not counting the fact that we now have kids) on Valentines Day.
Let's retrace Valentines Day for the past 8 years:
2011: Hubby leaves ON Valentines Day for a 10 day Air Assault Course
2010: Charlotte and I go to Texas to see hubby for a few days before he flies over to Kuwait.... we're together, yes... but his parents joined us in Texas
2009: It is 10 days before I had Charlotte AND Hubby is at a 2 week army drill... I ended up going to Lindsay's for dinner because her hubby was out of town at work
2008: By this time we have determined that Valentines Day was NOT our holiday, so apparently Hubby had rugby practice
2007: A good friend of ours, Lindsay, was living with us temporarily while her and her husband were in the process of moving to the area... so it was a romantic dinner for... er... 3
2006: This was before we got married so I was living in Miami and fiance was up here
2005: I was in Clemson, boyfriend was in Texas at Army Officer Basic Course
2004: We had recently started dating and boyfriend had an away rugby game... although for this year he DID make it back to his apartment by 11:30pm where I was waiting with ice cream sundays and ... well... whatnot.

There you go... see, Valentines Day is not really a big day for me, but I hope you have a fabulous day!
One of my (adorable) valentines!

Friday, February 11, 2011

Craft: Personalized boxes perfect as birthday gifts

I have recently found out about transfer paper or carbon paper for use in crafting... and I LOVE it! I don't know why I've never used this stuff before. I have my mom to thank. Last year, for Charlotte's 1st birthday, we (and I mean mom) painted every child's name on a $1 plastic bucket for their party favor. Awesome huh? First, I thought she was just that talented... because she can do that sort of stuff free hand. I come from a whole family of crafty people, but that's another post in itself. So after I praise mom how talented she is and thank her SO much for helping with the favors she let me in on her secret.... she printed out fun letters on the computer and used transfer paper to get them on the side of the buckets. THEN she used paint pen, ok... real paint... to paint the names. Turns out, the $1 buckets are SO cheap that the paint pen doesn't stick to it. It's either that or the quality of paint pens has decreased immensely!
That said, I am coming up on all of Charlotte's little friend's 2nd birthday parties... which tends to get expensive! Now, I'm not trying to be stingy, cheap, etc... but getting birthday gifts for 10 little kids over a few months is crazy.
So this year, inspired by a plastic bin that my mom made for me when I was little, I am decorating plastic boxes and filling them with goodies from the target $1 aisle (love that aisle by the way) and other smaller gifts that I can get in bulk and split up, like little play-doh's, cars, etc.
I start off by getting my supplies:
  1. plastic boxes - the paint pens stick well to these sterilite shoe boxes that I got for $1 (on sale) and $1.29 regular at Target
  2. carbon/transfer paper - one lady at Joann sent me to the t-shirt transfer sheets ever after I described my project... luckily I found someone who actually knew what they were talking about and directed me to the carbon/transfer paper. Apparently, they don't keep a lot in stock so good luck finding it.
  3. Paint pens
  4. A fun font on the computer
  5. goodies for inside the box
Then I print out my font, trim around the name/text I want, and cut myself carbon paper to go underneath and tape to the box so it doesn't move on you.


Then, using a clicky pencil with the lead not out, trace the letters.


Finally, go over the letters with paint pen and add cute designs
And we have a personalized box of goodies for the birthday boy (or girl). For the girls, I bought little dolls, plastic rings and bracelets, crayons, coloring books, and various other learning books from the $1 aisle.

Featured On: Dot Dot Dot

Thursday, February 10, 2011

Stylish Blogger Award & 7 things you may not know about me

Stylish Blogger Award

I received the "Stylish Blogger Award" from Shannon at Enjoy Life and Love. Thanks girl!!


Shannon is a fellow Clemson-ite and blogs about her super fun and easy crafts, projects, decorating her house, and other fun stuff! Check her out.

To accept this award you have to follow these 4 rules:

1. Thank and link back to the blogger who awarded you with the award
2. Share 7 Things about yourself
3. Award 8 recently discovered great bloggers
4. Contact the bloggers and inform them of the award

Okay so on to the 7 things:
1. I am a stay-at-home mother of 2 daughters living in the usually-too-hot state of Florida (although I must say that I do enjoy it during the winter when everyone else is stuck inside due to snow storms.

2. I refuse to buy something, crafty, that I can figure out how to do myself. This is how I have learned how to make my daughters hairbows, make diaper cakes, create those birthday/shower favor tags that are all over etsy, etc. I won’t spend $10 on a hair bow that I can make for $3 plus a little bit of time.

3. I LOVE taking pictures of my daughters; I take 30-40 in any given day and then have a slideshow for my husband on the TV that night so he knows what we’ve been up to.

4. I am a cat person… but was talked into adopting a LARGE laboradoodle, Duke (I swear he keeps growing)

5. I love college football season… Clemson to be specific.

6. I do not like going out to eat 2 meals in a row… which wouldn’t be too hard, but my in-laws live in town and when my husband was deployed in Kuwait, and we would be hanging out, they would want to go out to breakfast, then lunch… or lunch then dinner. Eating healthy while going out to eat is really difficult.

7. The only fast food I eat is Zaxby’s… that’s only when we travel up to see my parents in Georgia.

8 Deserving bloggers:
1. Katie @ A New Fit
2. Nichelle @ Vintage Wanna B
3. The Ladies @ Little Birdie Secrets
4. Amy @ During Quiet Time
5. Ashlee @ Pretty in Pink, and Orange too!
6. Becca @ Planet Applique
7. Michelle @ Sass, Spice, and Spitup
8. Meg @ Lokey Speak

Wednesday, February 9, 2011

Diaper Cake Tutorial

Hey everyone, well here is my tutorial on Diaper Cakes. I know there are tons of tutorials out there, but I think I've come up with a pretty simple one. Good Luck!

Start by (1) rolling up your diapers. This is a pretty long task... the diaper cake below uses 45 diapers (give or take)... so you can start with that. I suggest you roll them all up, that way when you decide to put it together it goes much quicker. I tend to spread out my diaper cake making into a few nights, otherwise I get bored.
To secure my diapers, I have used those tiny clear rubber bands, but I found that half the time they broke on me... so what I do now is pre-cut my ribbon (a few inches or so, just enough to tie around the diaper) roll the diaper with the fold on the outside (as in, it is the last thing you roll up). This makes the roll look cleaner. I then hold the rolled up diaper in the palm of one hand and then using my fingers and the other hand I tied the ribbon around it. Does that make sense? Maybe I should have taken a picture of that step.... hmmmm. It takes a few times to get the hang of it.
1. Roll up diapers
Once all of my diapers are rolled, I am ready to start on my (2) bottom layer. I use a large bottle of shampoo/lotion/etc as the center of my diaper cake. It makes a good base between the bottom 2 layers and it's useful; what new mom won't use baby lotion or shampoo.
For this layer I use a large rubber band around the bottle, and then I slip each roll between the rubber band and the bottle. Since the bottle is not a circle (as you can tell) I add a few rolls right next to the bottle on each side, and then I use a few non-rolled diapers to fill out the cake into a circle. Then I proceed to go around the bottle until I've made a circle of diapers 2-3 rolls deep.
Once complete, I tie ribbon around the whole layer and remove the rubber band (I use the same rubber band on the middle level.
2. Bottom layer

For the (3) second layer, I use the rubber band in the same way and slip rolled diapers between the rubber band and the bottle. Again, you'll see that I use a few non-rolled diapers to help fill out my circle. Finish off your layer by tying ribbon around the diapers and remove the rubber band.

3. Second layer

The (4) top layer is a breeze... using a smaller rubber band, I put 6 or 7 diapers together. You will notice the center one is sticking up a bit... this is from the bottle that I was using as a base... no problem.
4. All 3 layers
 Now that your cake is assembled, it is time to decorate. First I go around and trim up the excess ribbon from each diaper. I'm a perfectionist so I like my cakes to look clean cut and the grosgrain (or satin) ribbon does the trick. I use navy blue ribbon topped with orange and white polka dot ribbon. I use my hot glue gun to attach the ends of the ribbon together (not to the diapers... glue ribbon to ribbon), but I have used double sided tape, so whichever you have on hand will work.

(updated 2/22)
Here is the finished product:


For other samples of my diaper cakes, view my post here.

Tuesday, February 8, 2011

Looking Back: Charlotte's 1st birthday party

Somehow Charlotte is going to be turning 2 at the end of the month... I seriously do not know where the time went. Since I was (and still am) so proud of all the decorations I did for her birthday parties (yes... we had 2, one for our mommy/baby friends and one for family/people who work) I am going to post them all here:
Cake & Present table

Here's a bit of money saving advice... you can buy the character/design plates and napkins, but alternate them with a cheaper solid color. This way you have the design you want for the table, but you aren't spending the ridiculous amount they expect for all of your plates. No one will notice, they will probably think that you were mixing it up by adding colored plates. 

Personalized favors
These favors were a hit!! I got these buckets at the dollar store and we (mainly my mom) painted everyones names on them. Then I filled them with the balls from the ball pit. Ta da.

Month by month banner
 I got the idea for the banner on etsy. I LOVE etsy... although I have never bought anything there. I peruse for the ideas and then I make it myself. I do not want to spend money on something that I can figure out how to do myself. I bought scrapbook paper and printed out pictures of Charlotte through the year.


Instead of buying one of those "ball-pits" from the store and then having to buy more balls... I just got this inflatable baby pool on amazon for around $15 and bought up all the ball pit balls from target when they were having a sale.

 I bought the cake pan from Wilton and used cake mix with a package of pudding... yummy!

Entryway with pictures of Charlotte
Front door sign


Again, I saw the sign idea on etsy.

Favor tags
I saw favor tags on etsy (again). So I searched the internet for some cute duckie pictures and made the tag in photoshop.

Monday, February 7, 2011

DIY: Diaper Cakes

I had been wanting to make a diaper cake for the longest time, so a few months ago I decided to bite the bullet and go ahead and make one. They are about the easiest thing you can make... really. The first tutorial I read on someones blog made this super sturdy diaper cake using cardboard rolls from the UPS store as a center base and cutting out circles of cardboard for the base of each layer. It seemed pretty daunting, so I went and found another tutorial which seemed much more relaxed and I went ahead and made my 1st diaper cake for my friend Lindsay's shower. I used several items from her registry on the cake, plus some fun extras like the Baby Burts Bees stuff and a tiny football. I also covered cardboard (From diaper boxes) with paper and doilies as a base for each layer. I finished each layer off with 1.5" satin ribbon that I had laying around and some tags that I printed and punched out to spell her future sons name "Zeke". I am pretty proud of diaper cake #1.
Lindsay's Baby Shower

A month later, another one of our friends was having a baby shower, so a week before the shower one of the girls asked if I would make a diaper cake for a center-piece / gift.... so here goes #2. However, at this point, I had 2 kids at home (I think Jillie was a month old maybe) and I was not up for running around trying to find a bunch of stuff for this cake. Believe it or not, 90% of the stuff on cake #2 I already had in my house. I actually keep a box of "gifts" in the closet in the nursery. In here I put brand new stuff that is appropriate for re-gifting. Such as: the tiny bottle of baby powder,  boogie wipes (someone gave me a few of these for my baby shower and I never used them), brown bear... or maybe it's a dog for the cake topper, princess hair clips and bows, etc. The washcloths I bought for a dollar or so at Burlington Coat Factory..... come to think of it, I still have a few in my gift box. The ribbon was also laying around the house. The reason I have so much ribbon is because last year I was on a "bow making kick"... that was until Charlotte started refusing to wear bows... so I stopped. Also, for this cake, I rolled some diapers and did the layer thing (bottom level) for the others. Also, I didn't put cardboard between my layers. My cakes are evolving.
Brooke's Baby Shower

For my third diaper cake, I went a little smaller... but planned it out a bit more. I used less diapers (2 layers instead of 3 layers), but I went with matching toys from walmart on top and around. Voila diaper cake #3.

Lori's Baby Shower
Here is my diaper tutorial... hope it helps. Enjoy :)


Friday, February 4, 2011

Dad's Favorite - Spicy Garlic Shrimp

I absolutely LOVE coming across recipes that I completely forgot I had. Which is funny, you know when you make something, and you think 'wow, this is a great recipe, I'm going to make this a lot'... which you do for a while. Then something happens and it gets lost in the recipe box, or you forget which cookbook it's in... and THEN you have a few free minutes and are deciding what to have for dinner and you stumble across it again... SCORE!! That's what happened with this recipe. This is a really quick recipe to throw together, and it's kid friendly. Ok, so it may not be kid friendly, it's just MY kid friendly... heck, my 2 year old ate mussels the other day. Weird huh? So she liked this recipe, but she pretty much eats everything. The time consuming part of this recipe is the chopping of everything, but even that isn't bad. Enjoy!

Dad's Favorite* - Spicy Garlic Shrimp


Ingredients


1 pound shrimp (cut into bite sized pieces)
4 T olive oil
1 medium onion, chopped
1/2 red pepper, chopped
1 t Cajun seasoning
1 t Old bay seasoning

2or3 - 6inch andouille sausage, sliced into thin coins
4 garlic cloves, minced
14-ounce can jalapeno chopped tomatoes, undrained (like Roi-Tel)
14-ounce can chopped tomatoes, drained
1/2 C chicken broth
1/2 C dry white wine

1/2 to 1 t crushed red pepper flakes
salt and pepper to taste
1/4 C chopped fresh Italian parsley (or 2 T dried)
1 C frozen peas
16 ounce box rigatoni or penne pasta, cooked, drained

Directions
  1. In a large saucepan, over medium heat, add olive oil
  2. Add onions and sausage coins and cook 4-5 minutes until onion is wilted and sausage browns slightly
  3. Add red pepper, Cajun, and Old Bay
  4. Add garlic and cook one minute
  5. Add both tomatoes (one drained, one undrained), broth, wine, and crushed red pepper
  6. Simmer for 5 minutes
  7. Season with salt and pepper to taste
  8. Add shrimp, stir, and cook 3-4 minutes slightly covered
  9. Add parsley and peas and cook 2-3 minutes
  10. Stir in cooked, drained pasta
  11. Serve topped with parmesan
Linking up : Somewhat Simple

Dad's Favorite - Spicy Garlic Shrimp
* In our family we have a habit of naming recipes after that family member who likes it the most, who had it first, etc

Photobucket

Wednesday, February 2, 2011

Apple Cheese.... apple cheese...

"Apple cheese..." is what my daughter came up with completely on her own last night after dinner was done and my husband closed the fridge. I thought she was saying "apple juice"... but as she repeated it, it became clear that she was requesting the Apple Pie Cheesecake that I had made for Saturday night. The funny thing is that we didn't have any that night nor the night before... she came up with all by herself. Apparently, it was popular!!

We got this recipe from my brothers girlfriend who brought it for Christmas... and it was awesome. Since then, my mom made it for their neighborhood monthly cocktail party (how fun is that by the way?!) and I made it for some friends on Saturday. So far it's a hit! Here's the recipe:

My Apple Pie Cheesecake - Not a pretty shot, but tasty!

From Cooking Pleasures, (magazine I assume) - Stephanie Littlejohn, Lexington, OK
Apple Pie Cheesecake
Crust
2 C crushed gingersnaps
6 T butter, melted

Filling
3 (8oz) pkg cream cheese, softened
1 C sugar
2 eggs
1 egg yolk
1/4 C whipping cream
2 T flour
1 t amaretto flavoring or vanilla extract
2 medium tart apples, peeled, thinly sliced
1 T packed light brown sugar
1 t ground cinnamon

Topping
1/2 C flour
1/2 C packed light brown sugar
1/4 C finely chopped walnuts or pecans
1/4 C butter, melted
  1. Heat oven to 350*F. Spray bottom of 10-inch spring form pan with nonstick cooking spray. In small bowl, stir together crust ingredients. Press into bottom and 1/2 in up sides of pan; wrap outside of pan with foil. Bake 5-7 min or until set
  2. Meanwhile, in large bowl, beat cream cheese and sugar at medium speed 2-3 minutes or until smooth. Beat in eggs, egg yolk, cream, 2 T flour, and flavoring 1 min or until blended.
  3. In medium bowl, toss apples with 1 T brown sugar and cinnamon until lightly coated.
  4. Pour half of the filling into crust; arrange apples over the filling, overlapping slightly. Pour remaining filling over apples. Bake 40 minutes.
  5. Meanwhile, in small bowl, stir together all topping ingredients; sprinkle over cake. Bake 20-25 minutes or until top is golden brown and set 3 in from edge. Cool on wire rack to room temperature. Refrigerate overnight. Store in refrigerator.
Enjoy! My family did, and thanks Stephanie Littlejohn from Lexington, OK (and Cooking Pleasures) for this awesome recipe!

Tuesday, February 1, 2011

Slide show of the day

After being asked the question "so what all did you do today?" from my husband I came up with the nightly "slide show of the day". Oh, it also helps that I usually take like 20-40 pictures of my children a day. Yes... I have an external hard drive devoted to my family pictures.
... anyway, moving on... this past year with my husband deployed to Kuwait, I was religiously uploading all of our family pictures to Picasaweb so he could log on and see (a) how his baby girl was growing, (b) what kinds of stuff did we occupy our time with, and (c) my growing belly with baby girl #2. Now that he is home, he still doesn't really see what we do on a day to day basis. Sure I take pictures, but I upload them directly to the computer and unless I tag him in a few on facebook he doesn't really see them.
For Christmas, I got a new camera, and with my new camera I got one of those cords to connect it to the TV. Now I'm sure my old camera came with one, I just never used it. So every night, or sometimes every other if we get caught up, before I pull my pictures off of my camera, I hook it up to the 52" in the family room (and what parents doesn't want to see their darling angels on the 52"?) and we give dad a play-by-play of our fun filled day. He (says he) loves it and Charlotte gets a kick out of watching herself on TV. Here's an example from the other day:


Jillie watched mommy make breakfast


Charlotte went to school


We went for a ride in the wagon


Charlotte picked up some acorns


I tried to give Jillie a nap...


But Charlotte wanted to join in


Charlotte got REALLY messy with markers


Charlotte dumped all the balls out... which I cleaned up 3 times


Jilly did airplane


Not pictured but worth mentioning:
While Charlotte was at school, I did Babies R Us, Target, and grocery with Jillian
Picked Charlotte up
Made lunch
fed Jillie (a few times)
Fended off renditions of: "Abby abby, Elmo, Elmo.... Mickey Mimi?"
Prepped dinner
The end!

Link within

Related Posts Plugin for WordPress, Blogger...