Showing posts with label embroidery. Show all posts

Thursday, January 5, 2012

Our Month of Christmas {shirts, playdates, Christmas}

Wow, I can't believe Christmas is OVER! (although, not at my house... the decorations will be up until Sunday due to our Annual Christmas Cocktail Party on Saturday night!).

Better late than never, I figured I would share some of the craftiness and parties that went on in the month of December that were not aforementioned on the blog. Plus, I'll give you guys a quick peak at the MooreBabies Christmas!

December started out quickly by hosting a Stella & Dot, Cookie Exchange, Gag Gift Party with my mother-in-law; it was a lot of fun!
 Next was the Christmas Party for the mom group that I am a part of. I made this fantabulous dip for apples (cream cheese, brown sugar, caramel dip, mini chocolate chips, toffee bits)
Then I FINALLY got around to embroidering Charlotte some Christmas shirts so she could wear them to her preschool Christmas party. I LOVE the "C" Christmas tree; I got the design from Planet Applique, they have the BEST designs.
 Next we hosted a playdate for some of the girls friends at the house. It was in the morning so I had my waffle iron cranking out waffles for the kiddos; HUGE hit!
 I felt I had to do SOMETHING that I had pinned in my Christmas category, so here you go... the handprint christmas trees.
 And THEN it was CHRISTMAS MORNING!
Santa sure was good to these girls with a teeter totter, Step2 Roller Coaster, and a microphone!
Mimi and Grandpa weren't half bad either! However, I have NO idea where we are going to store this larger than life Mickey Mouse.
PS - did you hear we got Annual Disney passes
 Christmas was rounded up the day after when Gigi and Pop pop came into town.

I hope everyone had a wonderful holiday season (and are starting to get back into your routine again... it's hard!)

Linking up:House of Hepworths, Sew Much Ado, It's a Keeper
Photobucket

Wednesday, October 26, 2011

(REALLY late...) Matching Embroidered Shirts

I have had this post in my draft folder for.. oh... 3 months now!  I keep meaning to complete it (I mean, really... it's not that complicated of a post), but I never got around to it!

However, since I hope to soon have some embroidery shirts to show off for Thanksgiving and Christmas, I'd better get this (I'm embarrassed to admit this... ) 4th of July post out of the way.

4th of July... really?! Wow.

Since we were all going to be together, I decided to make my girls and their cousin matching shirts and hair bows. I appliqued a star burst of some patriotic fabric I had hanging around and then embroidered each girls initial on top (although... the stitching should have been a bit thicker).

I made the SUPER EASY fabric flowers (as seen here, but I can't figure out where I FIRST saw them) using the SAME fabric as the appliqued shirts and a large white button and then attached them to 2 headbands (for the little ones) and a clip for Charlotte.

Here is a close(r) up shot of both the headband AND the shirts
I think the outfits made for some super cute 4th of July pictures!
Pop pop, Gigi, & the girls


Photobucket

Tuesday, June 21, 2011

I hate "learning experiences"...

I spent this past weekend kid-free up with my girls in Atlantic City for a bachelorette party (and I'm still recovering if you want to know the truth). To say we had a blast would be an understatement. So anyway, being the "crafty-wanna-be" that I am, I decided she needed some fun shirts. Since I have an embroidery machine I said, "I'm going to embroider her a tank top that says 'bachelorette'". Easy enough, right? So I run to target and get the tank top and I get to my computer to set up the text.

I went with the Tinkertoy font; a font that I got for free and digitized myself using my 5D Embroidery Software. As I've said before, I am a novice at both embroidering and especially digitizing, but I thought I was pretty good at digitizing fonts. I mean, it's pretty simple. Click the "new font" button and follow the steps. So I create the project file on the computer with my Tinkertoy font about 1 inch tall, and head over to my mother-in-laws house (which is where the machine lives).

I get the girls upstairs, situated and I get started embroidering. About 10 minutes in I take a look and I realize that I'm only only like the 'c' (of Bachelorette)... which means this is taking FOR.EV.ER. Also, it looks like the shirt is kind of being pulled from back. But overall it didn't look too bad:


It wasn't until I was done embroidering the shirt and it was un-hooped that I saw how THICK the stitches were on the back.
I mean they are REALLY thick; thicker on the back than on the front... which is just wrong.

So I take it into 'my embroidery store' (aka the sewing place we bought it from and where I take all of my "what in the world did I do wrong" questions). So I walk in and say, "Ok... what in the world did I do wrong here? Is it the wrong kind of shirt?". No. It was operator error.

When digitizing, I always forget that the LOWER the Satin Density, the closer together the stitches are and the thicker they are. And since I apparently had a density of 5, and I used smaller letters, voila... REALLY thick stitches. (In my mind lower density means less dense.... not so much).


So 2 lessons learned here:
First - Always check the density... and it's always BACKWARDS of what I think.
And Second (something they tell me to do everytime I go in there with a screw up) always do a test run.... which I HATE to do. I only have so much time at my mother-in-laws with the kids happy, I don't want to waste my precious time on a practice run. Bleh.

I also did another tank top using iron on letters (which I LOVE)... she's the youngest of us 3 musketeers... so thus the 2nd shirt:

Linking up: A Bowl full of Lemons, Homework
Photobucket

Monday, June 13, 2011

Embroidered Graduation Gift

It's graduation season, so of course that means gifts for all the grads! We have this one girl who (a) worked in the nursery with my girls at church, (b) is the daughter of my hubby's old wrestling coach, and (c) is a neighbor... so we were invited to her graduation party.

I found out from her mom that she got accepted (early) to University of Florida so I decided I was going to embroider one royal blue and one orange towel (with my Husqvarna Diamond) with her initials on them to bring to college. That idea seemed great until my mom pointed out that poor and time-crunched college students do NOT sort their laundry and I didn't want all of her clothes to turn either orange OR blue. So instead, I opted for white towels, and embroidered in orange and blue.


I was hoping to digitize the free font "tinker toy", but then I got stuck with the whole satin versus fill on 5D software.... so I used one of the fonts that came with my software. I'm still pretty happy with how it turned out! (I definitely still need practice with my 5D software)

Linking up: Running with Glitter, Momnivores Dilema
Photobucket

Thursday, May 26, 2011

Latest embroidery projects

The embroidery machine has been working these past few weeks... I just kept forgetting to post about it! So here goes!

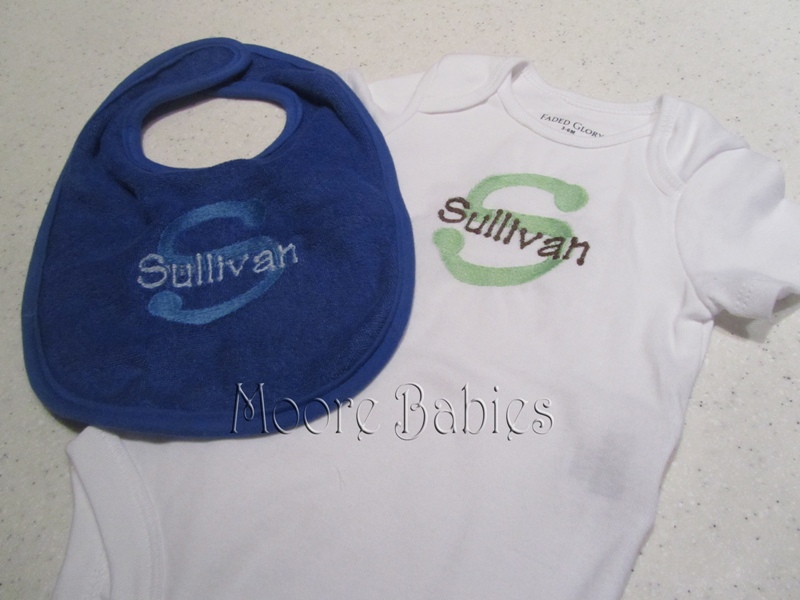
Baby gifts that I mentioned like.. 2 months ago:


This was a birthday gift for my brother (a fellow Clemson Tiger):

Matching dresses for my girls that I embroidered their names on (Love it!!... didn't make the dresses)


AND... another paying customer. I digitized the logo myself!
This summer I plan on trying to do 1 embroidery project a week (or every other week)... I need practice :)
Photobucket

Monday, April 25, 2011

My Worst fear...

Ok... so that may be a little dramatic... ok, let me rephrase that.

My worst fear, in regards to embroidering for money, came true. Blech.

Up until now, the embroidery I have done has been for gifts... my theory is that if someone gets it for free as a gift, they can't complain about it, am I right? I'm right.


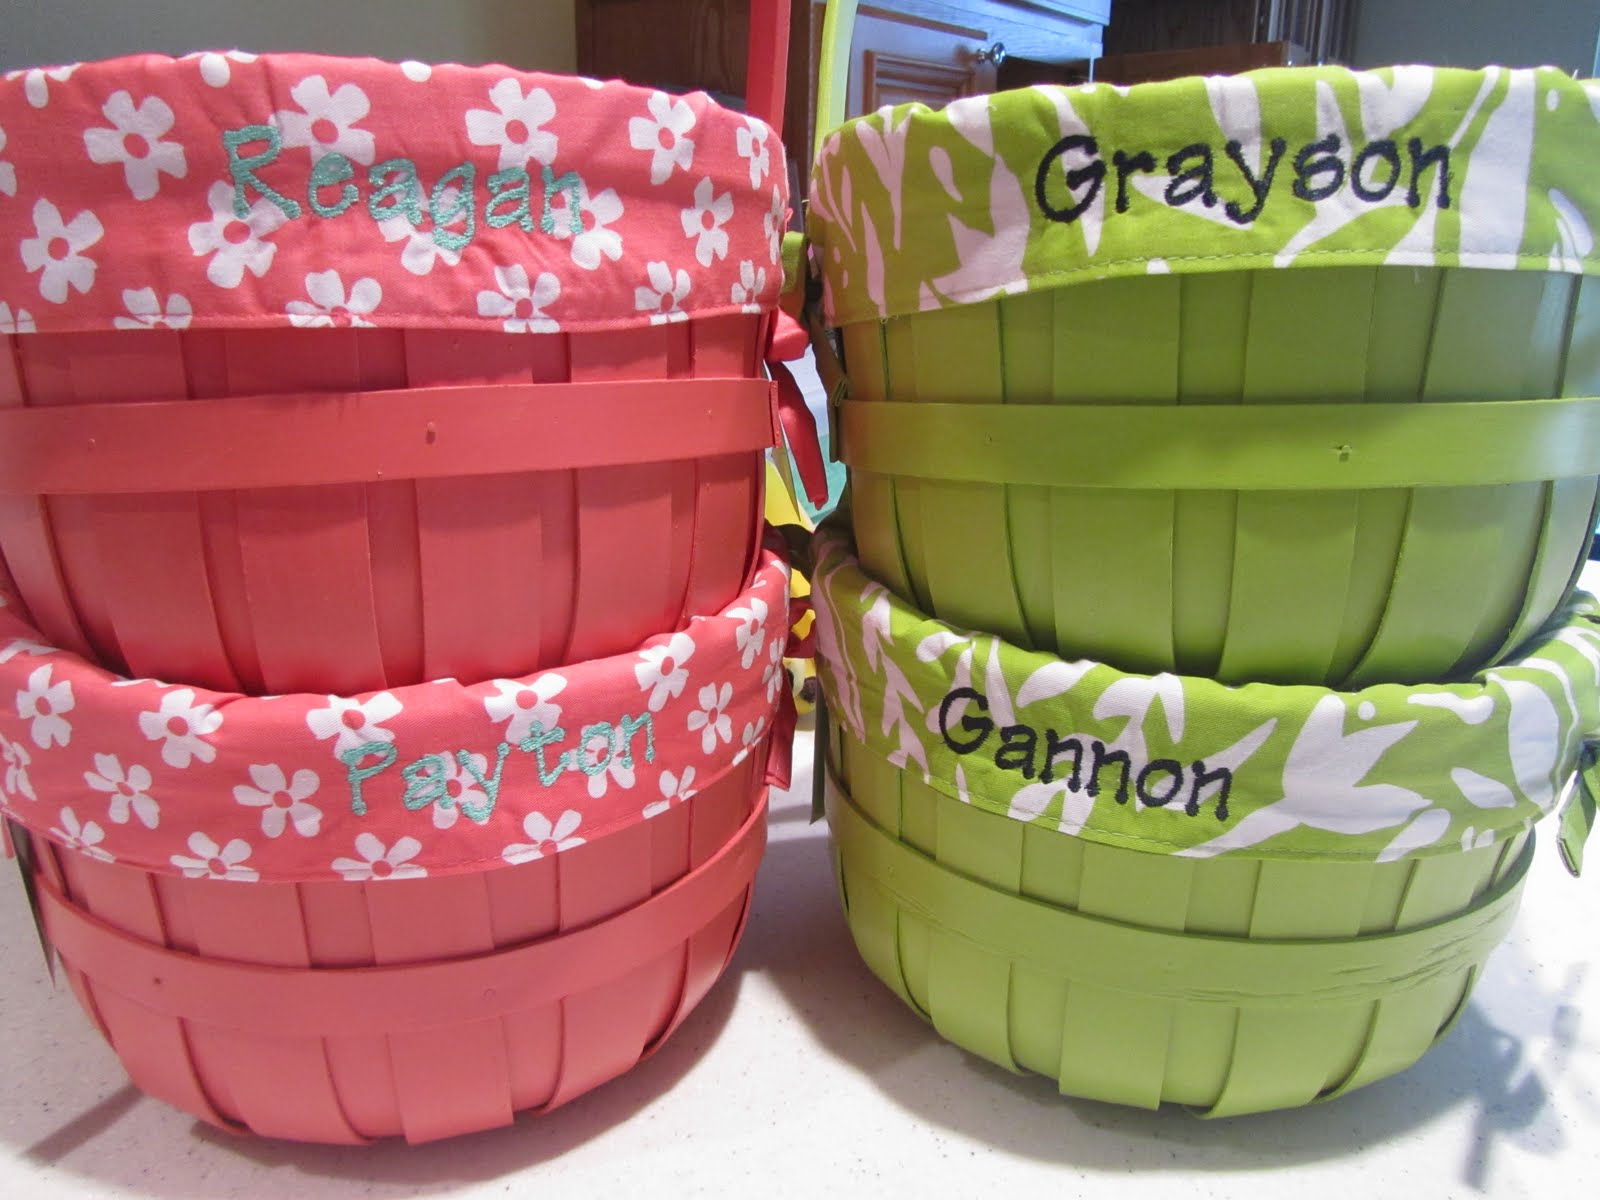
Just the other day, one of my fellow Junior Leaguers sent me a message saying she remembered (from facebook) that I have an embroidery machine and would I be able to embroider Easter basket liners for her daughters... she'd pay me. I said, sure... let me check out the liners to make sure I can physically do it. Everything looks good and she gives me a check and I take the liners.

I set up the names and head over to my mother-in-laws to embroider. After about an hour... voila! 2 personalized Easter basket liners. Completed.


I get home and see a message from another fellow Junior Leaguer and best friend of first Junior Leaguer. In short she heard that I had done the Easter baskets and could I please please please please do some for her kids. No problem! I get the baskets from her, set up the names and get ready for embroidering.

I was pretty hesitant about picking the embroidery color because these liners (from Target) are kinda BRIGHT pink and white (huge contrast there) for the girls, and a olive green and white for the boys. So I choose a navy blue for the guys and I try a teal green for the girls. Pink and teal looks good together, right? Not. in. this. case.

So I embroidered the girls baskets and .... oh no! I really can't see the names. What am I going to do? I have already unhooped them and don't have the skill to rehoop them... oh boy. Plus, these baskets are $12, do I go buy new ones and eat the cost?!

I rush off to my embroidery store and talk to "my" lady. After checking out my options I decide that I can use a fabric pen to darken the name. I embroidered myself a "Tester" piece of fabric and get started with the pen.
I used green ("P" and half of "Y") and purple (half of "a" and "t"). The purple seemed to bleed to me, although I could have just goofed on the "a", but I decided to go with the green.
Tester fabric

After a few coats I decide it's looking pretty good better and the end result is a happy customer!

Trust me... it WAS darker
Phew... crisis averted (although, like she said after I explained what I had to do was... they were only Easter baskets -- no sweat!)


Photobucket


Wednesday, March 30, 2011

I'm an AUNT!

Picture from Needle n Thread Sewing Co
I am so happy to be an AUNT for the first time! I am going to spoil that little girl rotten.
My brother and his wife welcomed their first baby, Brynnleigh, into the world this afternoon! Which, just so happens to be the day before the scheduled c-section; figures huh?

Here's a little back story: They knew they were having a girl but were withholding the name until their bouncing baby girl was born. All we knew was that the name started with a "B" and is 10 letters long (phew!!) My sister-in-law is due in a few days, but the baby is already measuring BIG for her tiny body, AND the baby hasn't dropped AND she isn't progressing, so they scheduled the c-section for Thursday.

Jump ahead to today: My brother calls while I'm in Sams stocking up so I answer and say, "Are you calling with news or just to chat?" In typical Andy fashion, he says "oh just to chat" and we talk for a few minutes and then he asks me if I want to know the baby's name. Which totally confuses me. I know I should have connected the dots, but she wasn't progressing and the c-section is tomorrow morning.... So I say, "I thought you weren't telling the name until she was born", and he hemmed and hawed and says "well, do you want to know?". And I'm all confused for the next few minutes saying stuff like, "well.. why are you telling me now?" and "Didn't you want to wait?", "wait... did you have the baby? No you didn't have the baby yet?.... Well did you?". Finally he says "Yes we had her". So of course I don't believe him, but then he put the brand new mama on. So now that I'm convinced, I make him start over from the beginning (which in my opinion is where he should have started anyway... instead of from the end). So anyway... YAY, I'm an Aunt!

That being said, I am now able to work on part 2 of Project #4 from my monthly goals post. So the second I get home from errands and the kids are asleep I hop onto the computer to start work on some embroidery projects for little Miss. Brynnleigh. If you read my earlier post (at the bottom)about embroidery projects you will remember that for me to do an embroidery project takes quite a bit of prep. So anyway, I hop on the computer and digitize the name and the stats and throw in some cutesy free digitized images that I found online and then I print out my finished product at 100% so I can use it as a template when I get to my mother-in-laws.

Sweet. I am stoked to get a jump start on Miss. Brynnleigh's gifts.

I then feed Jillie, fill up my cooler bag with my part of dinner, put my "embroidery bag" together (stuff that I carry from my house to my mother-in-laws and back for projects), gather up a few toys and get the kids into the car just before the rain starts.

I beat the rain to my mother-in-laws and cart everything and everyone into the house before the downpour. Just as the rain is starting, I look down at what I just carried in and realize I am missing the ever important "embroidery bag"..... in the immortal words of Homer Simpson...d'oh.

I'll try again tomorrow.

Keep an eye out for Brynnleigh's baby gifts!
Photobucket

Friday, March 25, 2011

Crafty birthday gifts

I mentioned in my month goals post that we had a few birthday parties to go to this month. Well... we have 3, and they are ALL this weekend. My*(scroll to bottom to read more) Husqvarna Designer Diamond Embroidery machine has been humming this week. I was helping my mother-in-law embroider some towels for wedding gifts AND I was working on some birthday gifts.


Birthday #1: One of my girlfriends commissioned me to make a "Hungry Caterpillar" shirt for her sons 1st birthday. She ORIGINALLY wanted an appliqued "1", the caterpillar, and his name... so I looked around and found this digitized image and bought in. The smallest it came in was 4x4, which is pretty big actually. I was GOING to try to make it work, but I was embroidering on onesies, and maybe it's just me (I'm sure it is)... but those suckers are difficult. You have to keep the extra fabric out of the way, and out from underneath (yeah... made that mistake once), and keep an eye on it so it doesn't sew over the back of the shirt... and I didn't think I could deal with doing the applique, then all the other stuff.


So instead of charging her for this shirt (since this wasn't exactly the shirt she wanted), I decided to make her 2 and give them as part of her sons birthday gift! Plus, you can't complain about free!


I think they turned out pretty dern cute if you ask me.
Birthday #2: I was going to embroider a shirt with Emie on it... but kind of ran out of time. So... no humming machine for this one. Emie is turning 2, so I stuck with the good ole potato head, book, play dough, and coloring book.


PLUS, she gets one of my handy-dandy personalized gift boxes.


Birthday #3: Let me start by saying, I'm proud of this one!! It uses 2 different crafts in one gift (ok technically 3). Here. It. Is:
Reese gets her very own handy-dandy personalized gift boxes (1st craft):
The party is Strawberry Shortcake themed, thus the paint book and DVD... but check out that apron! Pretty neat huh?


Reese has one of those killer step 2 Grand walk in kitchens that her mom got off craigslist. So... I went and bought a child's apron from Joann (obviously using a coupon), then went to the computer and made the design for the embroidery. When I completed the embroidery (2nd craft), I looked at it and said "this is good". But THEN I walked past where my rosettes were laying and I got the idea to put little rosettes on her apron! (3rd Craft)


A few days ago I was reading through blogs and I saw one girl had put a rosette on her shirt and commented that if she were to do it again, she would button it on so it wouldn't mess up in the wash. So that's what I did...


 I sewed the bottom of the button to the apron fine, but when I was going to sew it onto the rosette I decided to sew it to another small piece of fabric (I didn't want thread to ruin my beautiful rosettes), and then fabric glue that to the back of the rosette. Hope it works!


I hope you guys enjoyed reading about my birthday crafts!

* When I say "my" Husqvarna Viking Embroidery machine, I really mean the one that my mother-in-law bought for us to "spend time together" doing. It's an awesome machine, it REALLY is... I just don't know how to sew. Embroidery is different, it has software ($$$$) which, coming from my background, is a flipping breeze. But anyway, I never wanted the machine, but I use it now. You may be wondering why you haven't seen more embroidery projects on here... embroidering difficult for me for the following reasons:
  1. The machine is 20 minutes away, at her house
  2. I have 2 children
  3. The room is REALLY cluttered and only has space for a couch and a TV, no toys. So if I'm over there and the kids are awake, they have to be watching TV, which I don't really like relying on.
  4. I have to plan ahead to get over there to embroider something - I have to make sure I have the design I want on the jump drive, and printed out, make sure I have any fabric I need, the stabilizers, thread, shirt/towel/etc... etc
  5. I spend half the time over there re-teaching her to use the machine (that she wanted to buy) because I'm the only one who uses it.
I don't mean to sound ungrateful. Hopefully I'll get over there to do more projects so I can get the hang of this beautiful and wonderful machine.

Linking up: Naptime Crafters, Remodelaholic, Lamb Around, Hazel and Honeysuckle, DIY Showoff, C.R.A.F.T., Keeping it Simple, Sarahndipities, Live Laugh Love Lucy, Vintage Wanna Bee, Not Just a Housewife, A Bowl Full of Lemons, Dot Dot Dot, Sew Much Ado, Handy man Crafty Woman, Someday Crafts, DIY by Design, Somewhat Simple, Momnivore's Dilemma, Gluesticks


Photobucket

Link within

Related Posts Plugin for WordPress, Blogger...